Fundamentals for Planning A Kilimanjaro Trek
Kilimanjaro is the tallest mountain on the continent of Africa & comprised of three dormant volcanos. Of the three, Uhuru Peak is the highest at 5,895 m (19,341 ft).

Uhuru Peak from Shira I camp. Still so far away! [Visual description: Dark foreground with few lights from ranger hut & tents, swirly low clouds in the background with a piece of Uhuru Peak peeking out from the clouds. Small stripes of snow on the purple-grey peak].
I mean, you could just show up in Tanzania & complete the journey. It works out for some! But for the rest of us…If you are a scrupulous person, you can get swamped in researching everything ad nauseam. So here I have broken down the groundwork: Ability, Altitude, Tour Operator, Budget, Season & Route. First folks ask “Can I do it?” and second, they worry about altitude. So, I’ll address those matters first.
Budget, route, tour operator, & season are intimately tied together & not necessarily in sequential order. You’ll find a wealth of blog posts about specific route options, budget estimations, and how to pick a tour operator. Many operator sites offer a lovely breakdown of best seasons to climb. I won’t regurgitate those details, but I can talk through the pieces that I found helpful.
1. Ability.
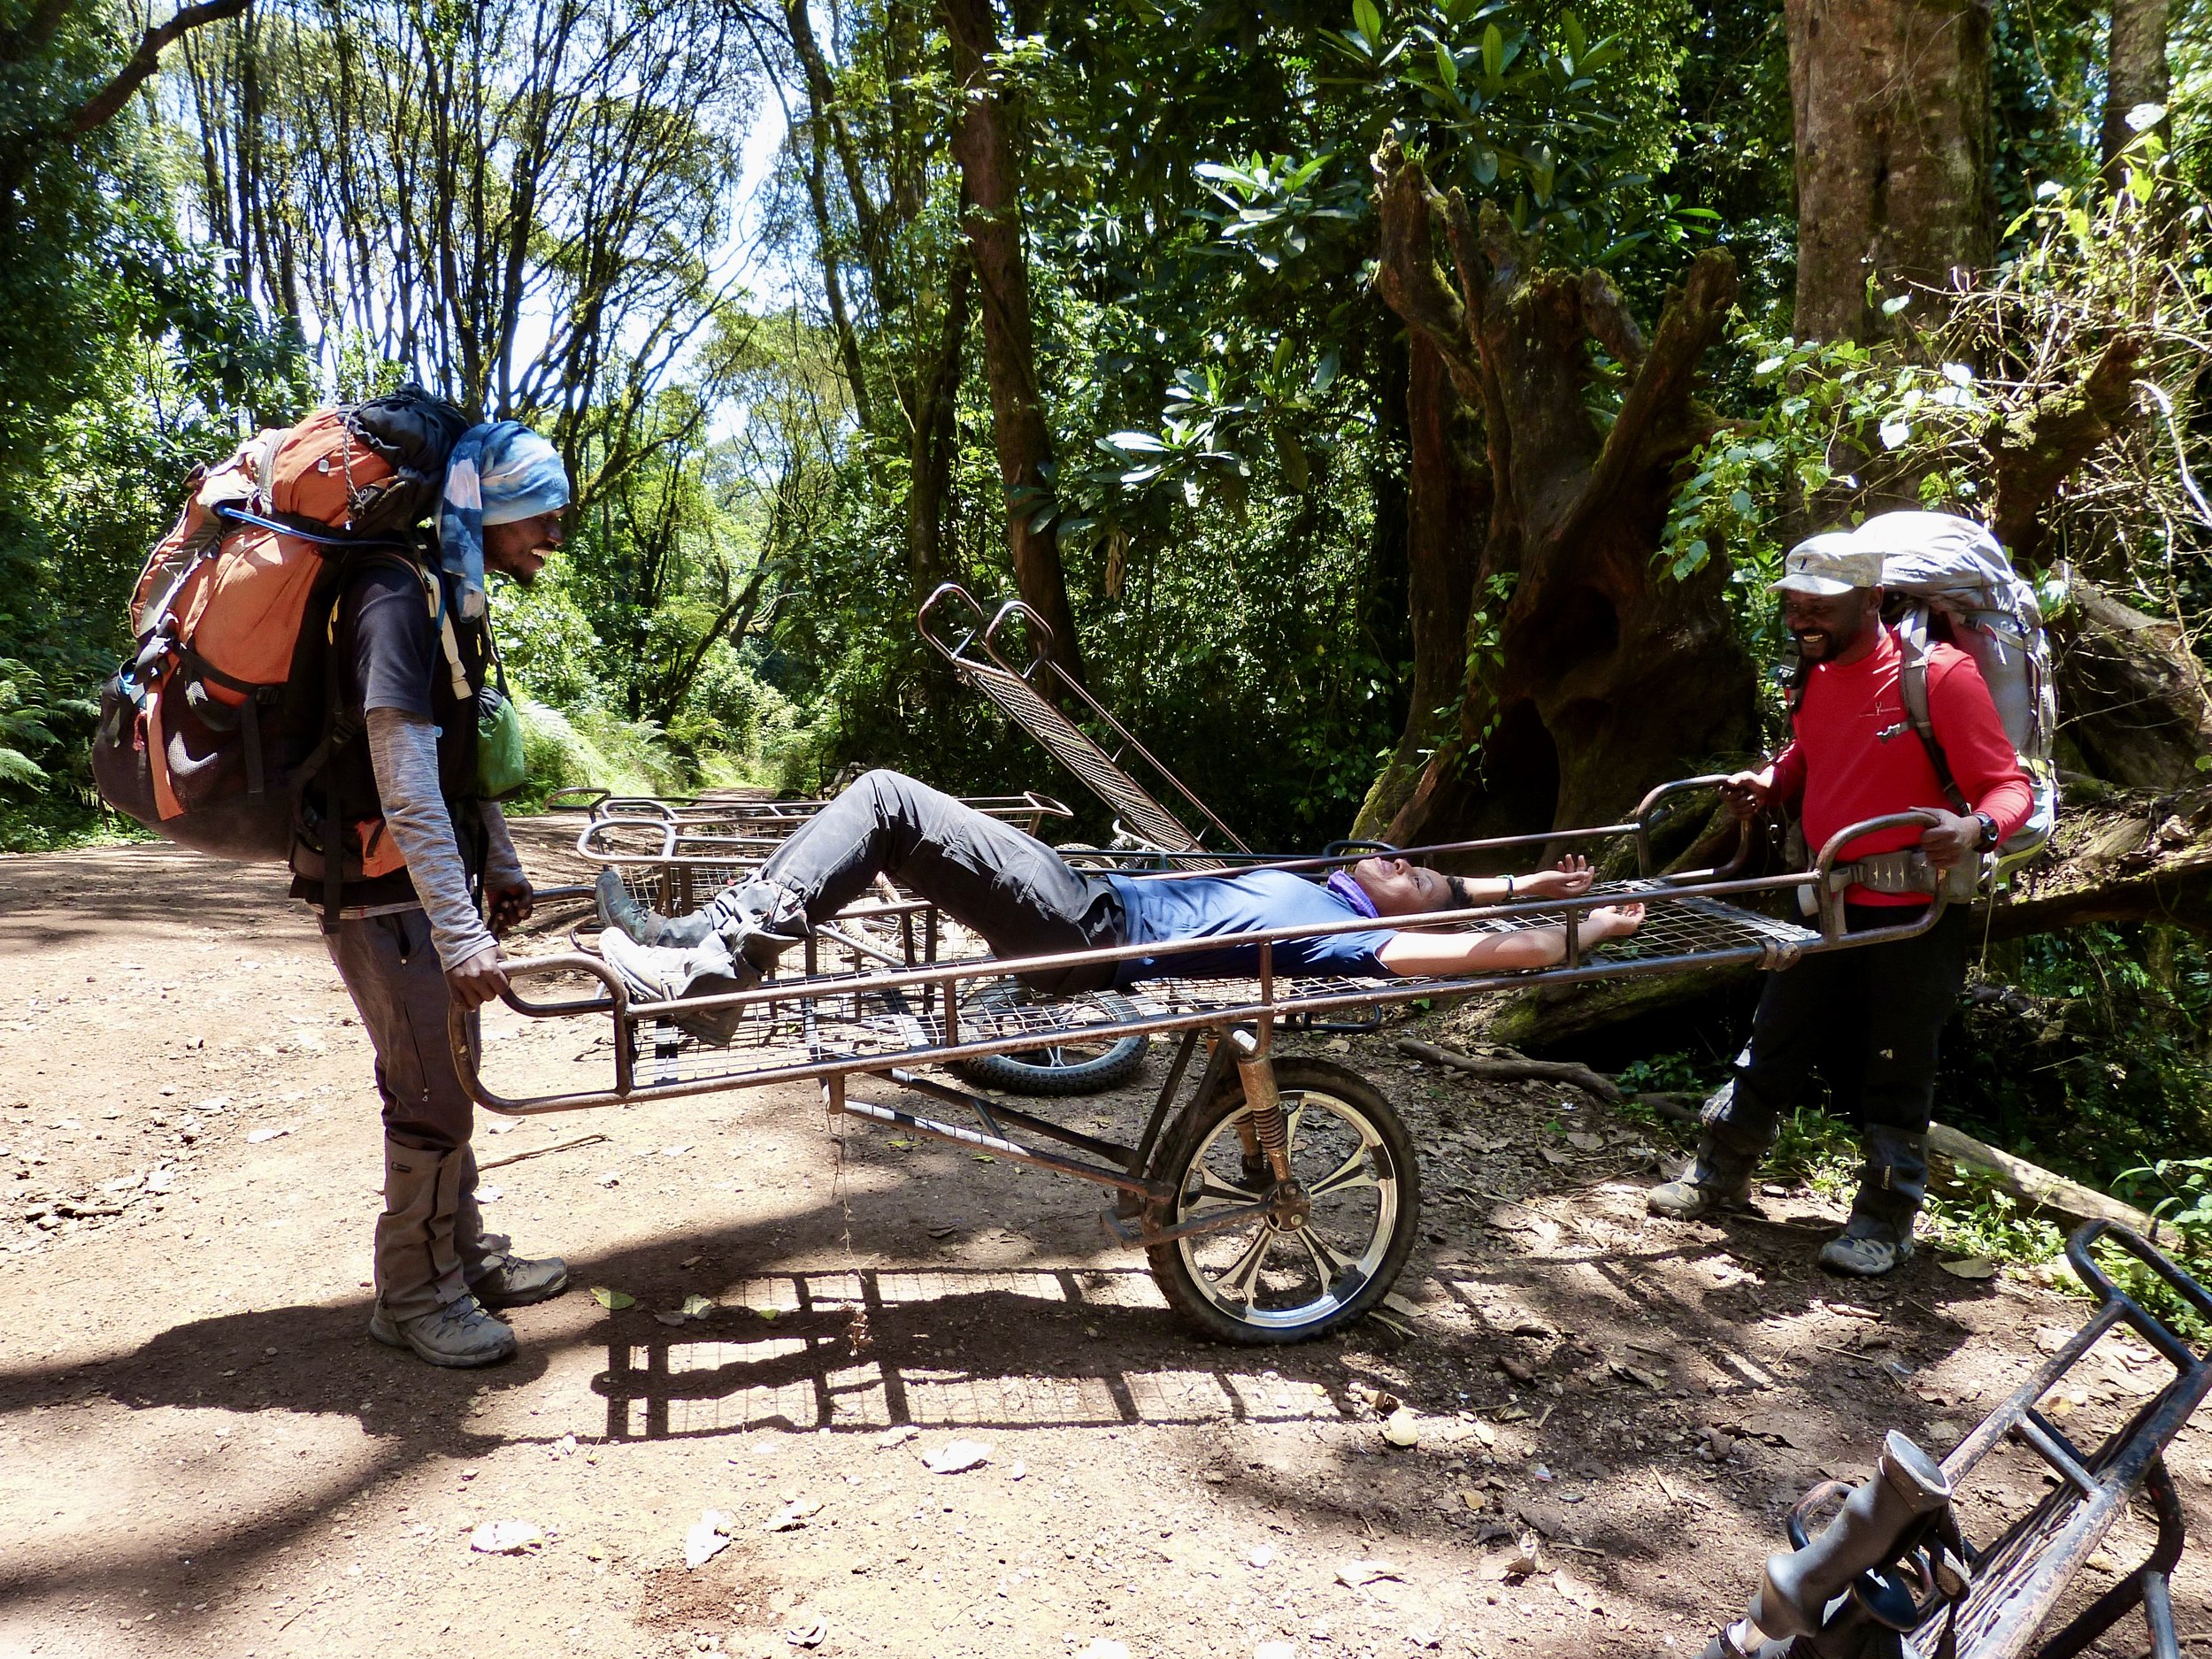
Kassina tests out the stretcher! [Visual description: Our assistant guide (Rodgers) on the left wearing a blue/white buff on his head, large orange backpack. Kassina wearing blue shirt, grey pants in the middle laying flat on a metal stretcher with one wheel in the center, arms outstretched above her head. Our guide (Msuri) on the right with a bright red shirt. Rodgers & Msuri holding both ends of the stretcher. Everybody smiling. Jungle background].
First off: Can you do it? Probably.
Our Tanzanian guides expressed pride that climbing Kilimanjaro is (relatively) physically accessible to many people. They shared stories of their clients young & old, as well as clients with physical or mental disabilities. That’s not to dismiss Kili as “easy”—rather, the opposite, as illustrated in this candid account, by Tarryn Tomlinson, who details her experience climbing Kilimanjaro in a wheelchair. Nevertheless, Kili is more accessible than other high-altitude summits because it is not a technical climb. You will be on a well-trodden trail so you don’t need mountaineering skills. But you still need to be prepared.
There is a plethora of online info regarding fitness prep for Kili. I’ll try to break it down simply-ish:
Find one solid fitness plan & stick with that. Hint: They are all pretty much the same. Ultimately, the best way to prep for a trek is to go on a trek! Ideally, hiking will have elevation gains and losses & you should use the daypack with the gear/weight you intend to use on the trip. If that isn’t realistic (i.e. you can’t access trails with elevation), fitness plans often recommend the stair master (ugh!) & strength training.
If you are a hiking newbie: Start slow. If you have overly ambitious goals, you’ll give up, or worse—get injured. But the reality is that you’ll be hiking between 3 hours a day (minimum) and 12-14+ hours (maximum) for multiple days in a row. The point is—endurance training is useful. I’ve done 14+ hour hikes before, so my body knows. But if you’ve never done anything of the sort, that’s okay. It isn’t necessary. You’ll just need more practice & guidance.
You’ll be tent camping, unless you go on the Marangu (aka Coca-Cola) Route, where you stay in dorm-style huts. So if you haven’t done a lot of tent camping—you should practice that too.
For me, the day to day trekking was not physically challenging. I’m not saying my fitness is superb, rather, I genuinely felt prepared & our route was quite gradual in elevation changes (with the exception of the summit). But this really depends! One of my hardest days was a flat, 3-hour hike because I was sick with a GI illness & associated dehydration.
But what was challenging for me was tent camping for 9 nights in a row. I’ve done plenty of tent camping in my life, but was in a fair amount of pain on the trek despite the thick sleeping mattress. Stretching & ibuprofen are your friends, especially if you have any chronic musculoskeletal pain issues. And the mental challenge? That was real, because the pace is pole pole (slowly, slowly in Swahili). Like, frustratingly slow at times.
I like to relish the journey and feel my heart pumping. However, since we were the only two clients in the group, our guides were able to adjust. I eventually settled into the pole pole adjusted pace, which isn’t just a hiking speed, rather a whole mindset. The slower pace is also helpful for acclimatization…
2. Altitude.
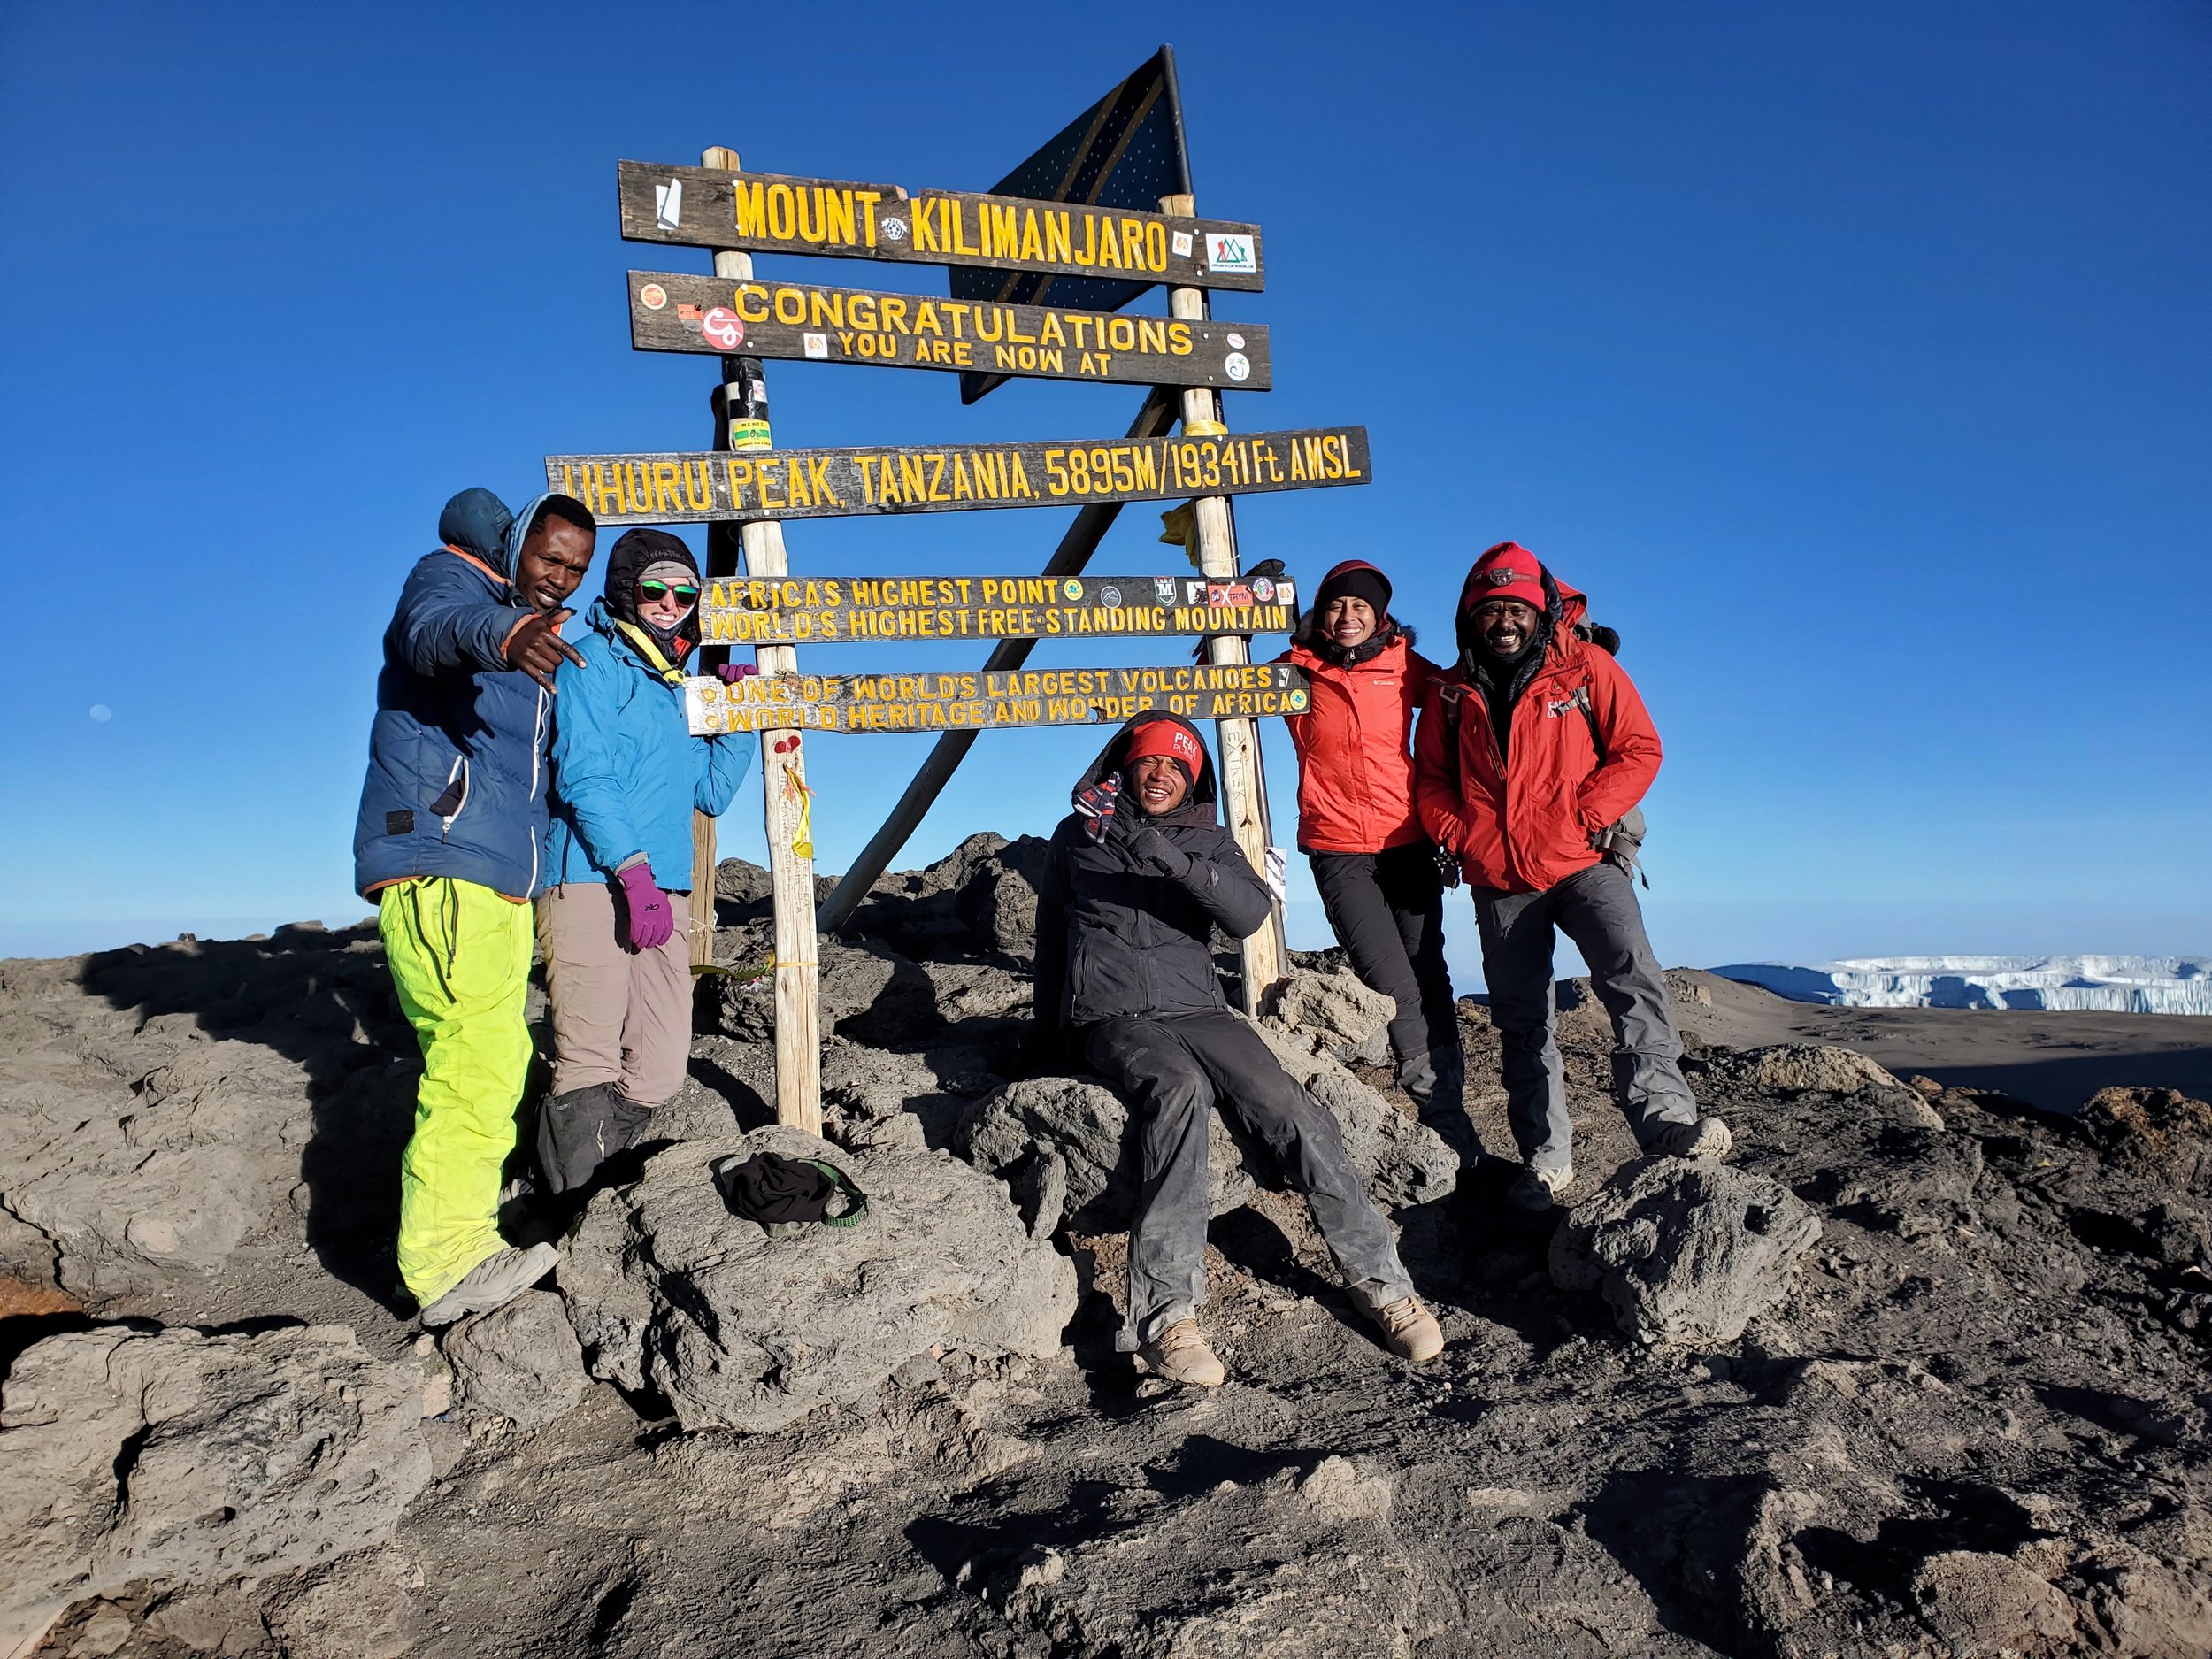
Summit photo. [Visual description: 5 people on the top of Uhuru Peak with wooden sign: Mount Kilimanjaro, Uhuru Peak Tanzania, 5895M/19341Ft. Rodgers (asst. guide) on the left with puffy blue coat, bright yellow ski pants, Sarah (me) with a million layers, blue rainjacket, khaki pants visible, Humphrey (special porter/training to guide) sitting in center wearing all black except red beanie, Kassina standing on right with red jacket and black pants, Msuri (guide) with red hat & jacket, black pants. Glaciers in the far distance to the right. No other snow at the summit, just rocks/boulders].
You can be the most physically fit person in the world and get altitude sickness. So don’t get cocky. Similarly, you can live at sea level & still climb this mountain.
The highest previous elevation for me was Larkya La pass in Nepal at 16,752ft or 5,106m. I had zero issues with elevation on our Nepal trip. But I felt unwell once or twice before on (little!) Mt. Charleston at 11,916ft or 3,631m, which is our Vegas area high point. So, it depends! Basic tips to help avoid altitude issues include the route (go high, sleep low), good hydration, sufficient food intake (even when appetite is down), and no alcohol use.
This isn’t medical advice! But do a little of your own research on the CDC Yellow Book regarding altitude & medications. Talk to your medical provider. Ask questions.
As far as Diamox (prophylactic med) goes, a few tips: If you end up taking it twice per day, our guides recommended taking with breakfast and late lunch. It will make you pee, so taking it at night isn’t ideal. And if you have a non-serious sulfa allergy like me, you can probably take it safely—but you’ll want to trial it at home first. Shrugs. You can take it for prevention or not, but you need to have it (or dexamethasone) with you just in case. Make sure you know how to take it prophylactically versus for treatment of acute symptoms.
Despite what every fabulously atrocious 90s climbing movie may suggest, you do not—sadly, inject yourself in the neck with dex. (Or any medication, ever). The injecting medication into the neck or heart movie cliché is so much better than the dull reality. Sorry.
3. Tour Operator.

Peak Planet crew at Shira I camp! Standing from left to right: Msuri (guide), Samson (porter), Mustafa (porter), Victor (porter), Paulo (porter), Charles (special porter), Maick (porter), Ondeska (porter), Humphrey (waiter/special porter), Innocent (special porter), Patrick (cook). Kneeling in front: Alfonce (porter), Rodgers (asst guide), Naman (porter). [Brief visual: All those guys posing with shrub covered hills and clouds in the background. Cloudy light].
Find a tour operator with guides who are well-trained & equipped to deal with altitude sickness or other emergencies along the way. Our guides had a long list of qualifications & stressed safety. Beyond a solid safety record, it is vital that the operator treat their staff in an ethical manner. Compare a few companies, and be wary of too-good-to-be-true pricing, as their staff is likely poorly trained, equipped, & cared for. It is helpful if your operator is a partner of the Kilimanjaro Porters Assistance Project (KPAP).
My hiking partner & friend, Kassina, invited me on this journey & she had done the initial research on routes & tour operators. After my own extensive online searching, I agreed with her that Peak Planet fit the bill as our tour operator. Although there were a few minor hiccups, which is to be expected with any company, the overall experience was outstanding. I won’t duplicate my review of Peak Planet, but you can read the full details here on Trip Advisor.
Most companies will offer a “package” which includes park fees, food & water during the trek, transportation to & from the airport, as well as accommodation for one night before & after the trek. Also make sure it includes a private toilet tent or spend the extra money. I promise you don’t want to use the public toilets, as they vary from acceptable (squat toilet with door) to appalling (human excrement piled in a shack). Nothing I’ve never seen before, but the private toilet tent was far superior. One porter alone manages the toilet—set-up, tear-down, carrying, cleaning.
Although the crew of 12 seems gigantic, each person has a specific job. And this isn’t your basic backpack. There are sleeping tents, a mess tent, chairs, cook tent, heavy propane canisters, an entire kitchen with veggies, fruits, meats…You get the picture. No dehydrated meals here! It takes a lot of people to carry all that.
If you are experienced & used to doing things yourself, it can feel weird to have a crew doing things for you—everything from setting up camp, serving you meals, filling your water bladder, carrying your gear, etc. I felt like a child at times, even more with my African Frutti juice box in the mix! (Although, I loved the juice boxes so I’m not complaining). The tourism industry, as problematic as it can be, does provide a huge source of jobs for folks in Tanzania. Just please treat your crew as fellow humans.

Victor carrying a load along the Northern Circuit piece of our route. [Visual description: Victor wearing a white sweatshirt and black pants carrying a large tan basket on his head. Walking on a trail with tan/brown rocks and boulders on either side. Bright blue sky with few white clouds in the background].
Safety.
A brief note on safety. Going solo or worried about safety on the trek? Your crew will most likely be all men. Although female guides & porters do exist, they are uncommon. For my experience, our crew was nothing but respectful & kind. I felt entirely safe on the trek in that regard.
The crew should also communicate with you about safety of belongings as there has been casual theft in some of the busier camps. On those nights, we kept everything including shoes inside our tents. At the pre-trip briefing we were advised not to bring large amounts of cash & valuables on the trek itself. We kept ours in a locked suitcase inside the hotel back in Moshi. Talk to your tour operator if you have concerns, because this can be a little unsettling as you are bringing larger sums of cash to Tanzania.
Group or Private?
You also need to consider trekking with a group of strangers versus “private”—your chosen group. For us, the dates & route we desired already had fully booked groups. So, we decided it would just be the two of us & the crew. As far as pros/cons of a private trek:
Pros: You will have a smaller Tanzanian staff including guides and porters, so you have more of an opportunity to interact & get to know them! I’m talking a crew of 12+ versus 40+ depending on group size. So, the vibe is going to be more laid-back & quieter. Plus, you won’t have to deal with multiple personalities in case you don’t like other guests in your group.
Cons: Steeper cost. And this isn’t just for the trek sticker price, that also means you’ll be paying more in tips. Another possible con is if you enjoy interacting with trekkers from all over the world, you will be doing less of that with a private group.
Cost may really factor into your decision, but won’t be the only consideration. So, what is the cost?
4. Budget.
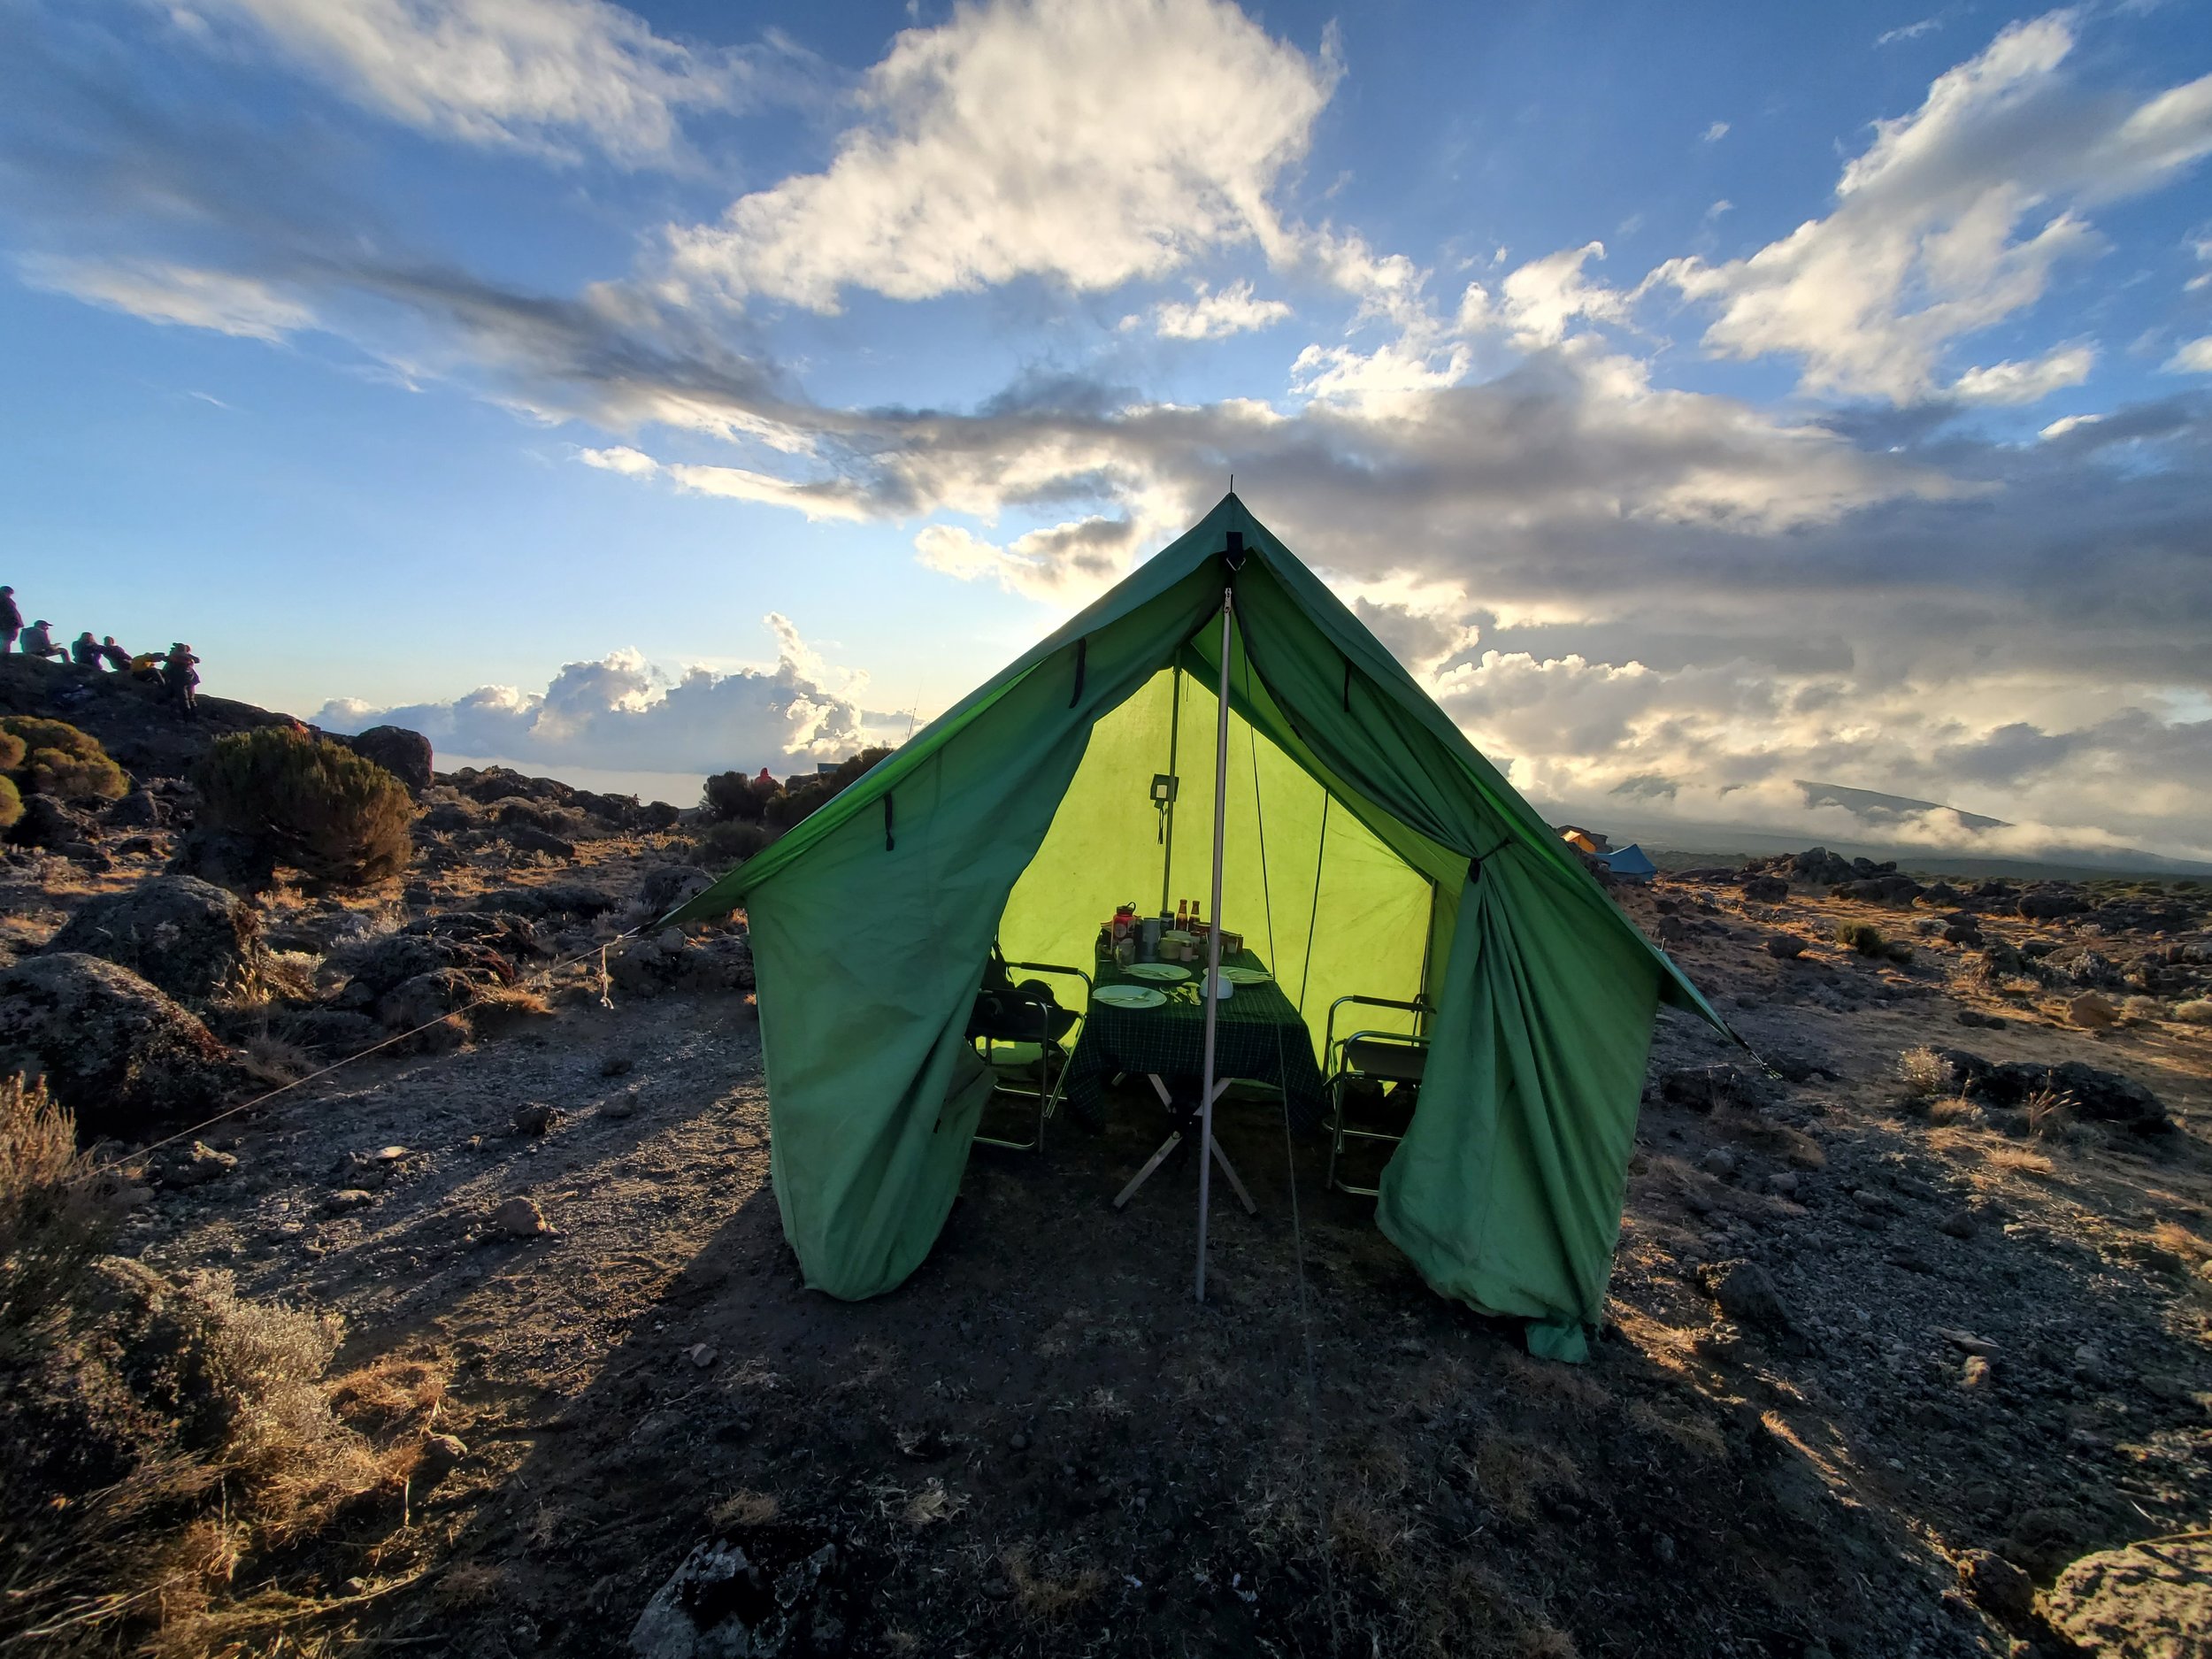
Is this glamping? I think so. [Visual description: Green mess tent with sides open. Inside is a table with tablecloth & two chairs. Tent is on the rocks with clouds and late evening light].
This trip is going to be pric-ey—it isn’t financially accessible to many folks at all. But it’s also relative, as a Kili trek is still likely cheaper than say, a two-week vacation from the U.S. to Europe.
I won’t talk too many specific numbers, because that will fluctuate depending on a myriad of factors. But consider international airfare, tour operator cost, travel insurance, tipping (which I’ll expand on in a minute), any gear you may need to purchase, pre-trip medical appointment + medications, Tanzanian visa, transportation & lodging costs if you extend your trip on either end of the trek, & other expenses while in Tanzania. I’ll put a pin in the “other expenses” for a future post because those can really add up.
Let’s be pragmatic: If your available vacation time and/or budget are on the lower side, you may be steered toward a shorter & less expensive route. Just consider that shorter routes equal less time to acclimatize, so higher likelihood of altitude sickness and/or not reaching the summit. That said, all routes appear lovely. So, shorter & cheaper (and it won’t be cheap!) doesn’t mean subpar.
Your operator will require a deposit up front to secure the trek. Then make sure to communicate how flexible they are to pay the rest of the balance. For me, I paid the remaining in installments over a year-long period. I really spaced out expenses over time, although it is beneficial to purchase travel insurance (mine was roughly 300USD) at the same time you put down your trip deposit.
Tipping.
For tipping—it isn’t just the tip for your guides and porters you need to budget (although this will be the loftiest). It is also tips for hotel staff, safari driver (if you do a safari) & others that may help you out along the way. I truly despise the concept of tipping and want a world where people are simply paid what they deserve. But, unfortunately that isn’t our current reality & folks in Tanzania rely on tips!
I sorely underestimated the price of tipping early on in budgeting for our trip. So, I’ll use some specific numbers here to illustrate the tipping cost (as of 2022). My personal tip to crew was 570USD. Then a total of 60USD for hotel staff (in a communal box) for six nights accommodation. As well as 15USD to a driver for a one-day safari. There were other minimal tips here & there, so add another 10USD.
So, that is roughly 655USD or 1,527,460.00 Tanzanian schillings (at time of this writing) in tips alone. Crew tip really varies depending on length of trek, climb type, and personal choice. Tipping recommendations should be broken down in a transparent way on your operator’s website. As should the process of the tipping ceremony, which is—er, uncomfortable—so read up so you have an idea of what to expect!
To put things in perspective—the national average gross income in Tanzania in 2021 was 1140USD. So, the average Tanzanian would need six months to earn what I spent just on the crew tip. So, yeah. Tipping should heavily factor into your budget.
5. Season.
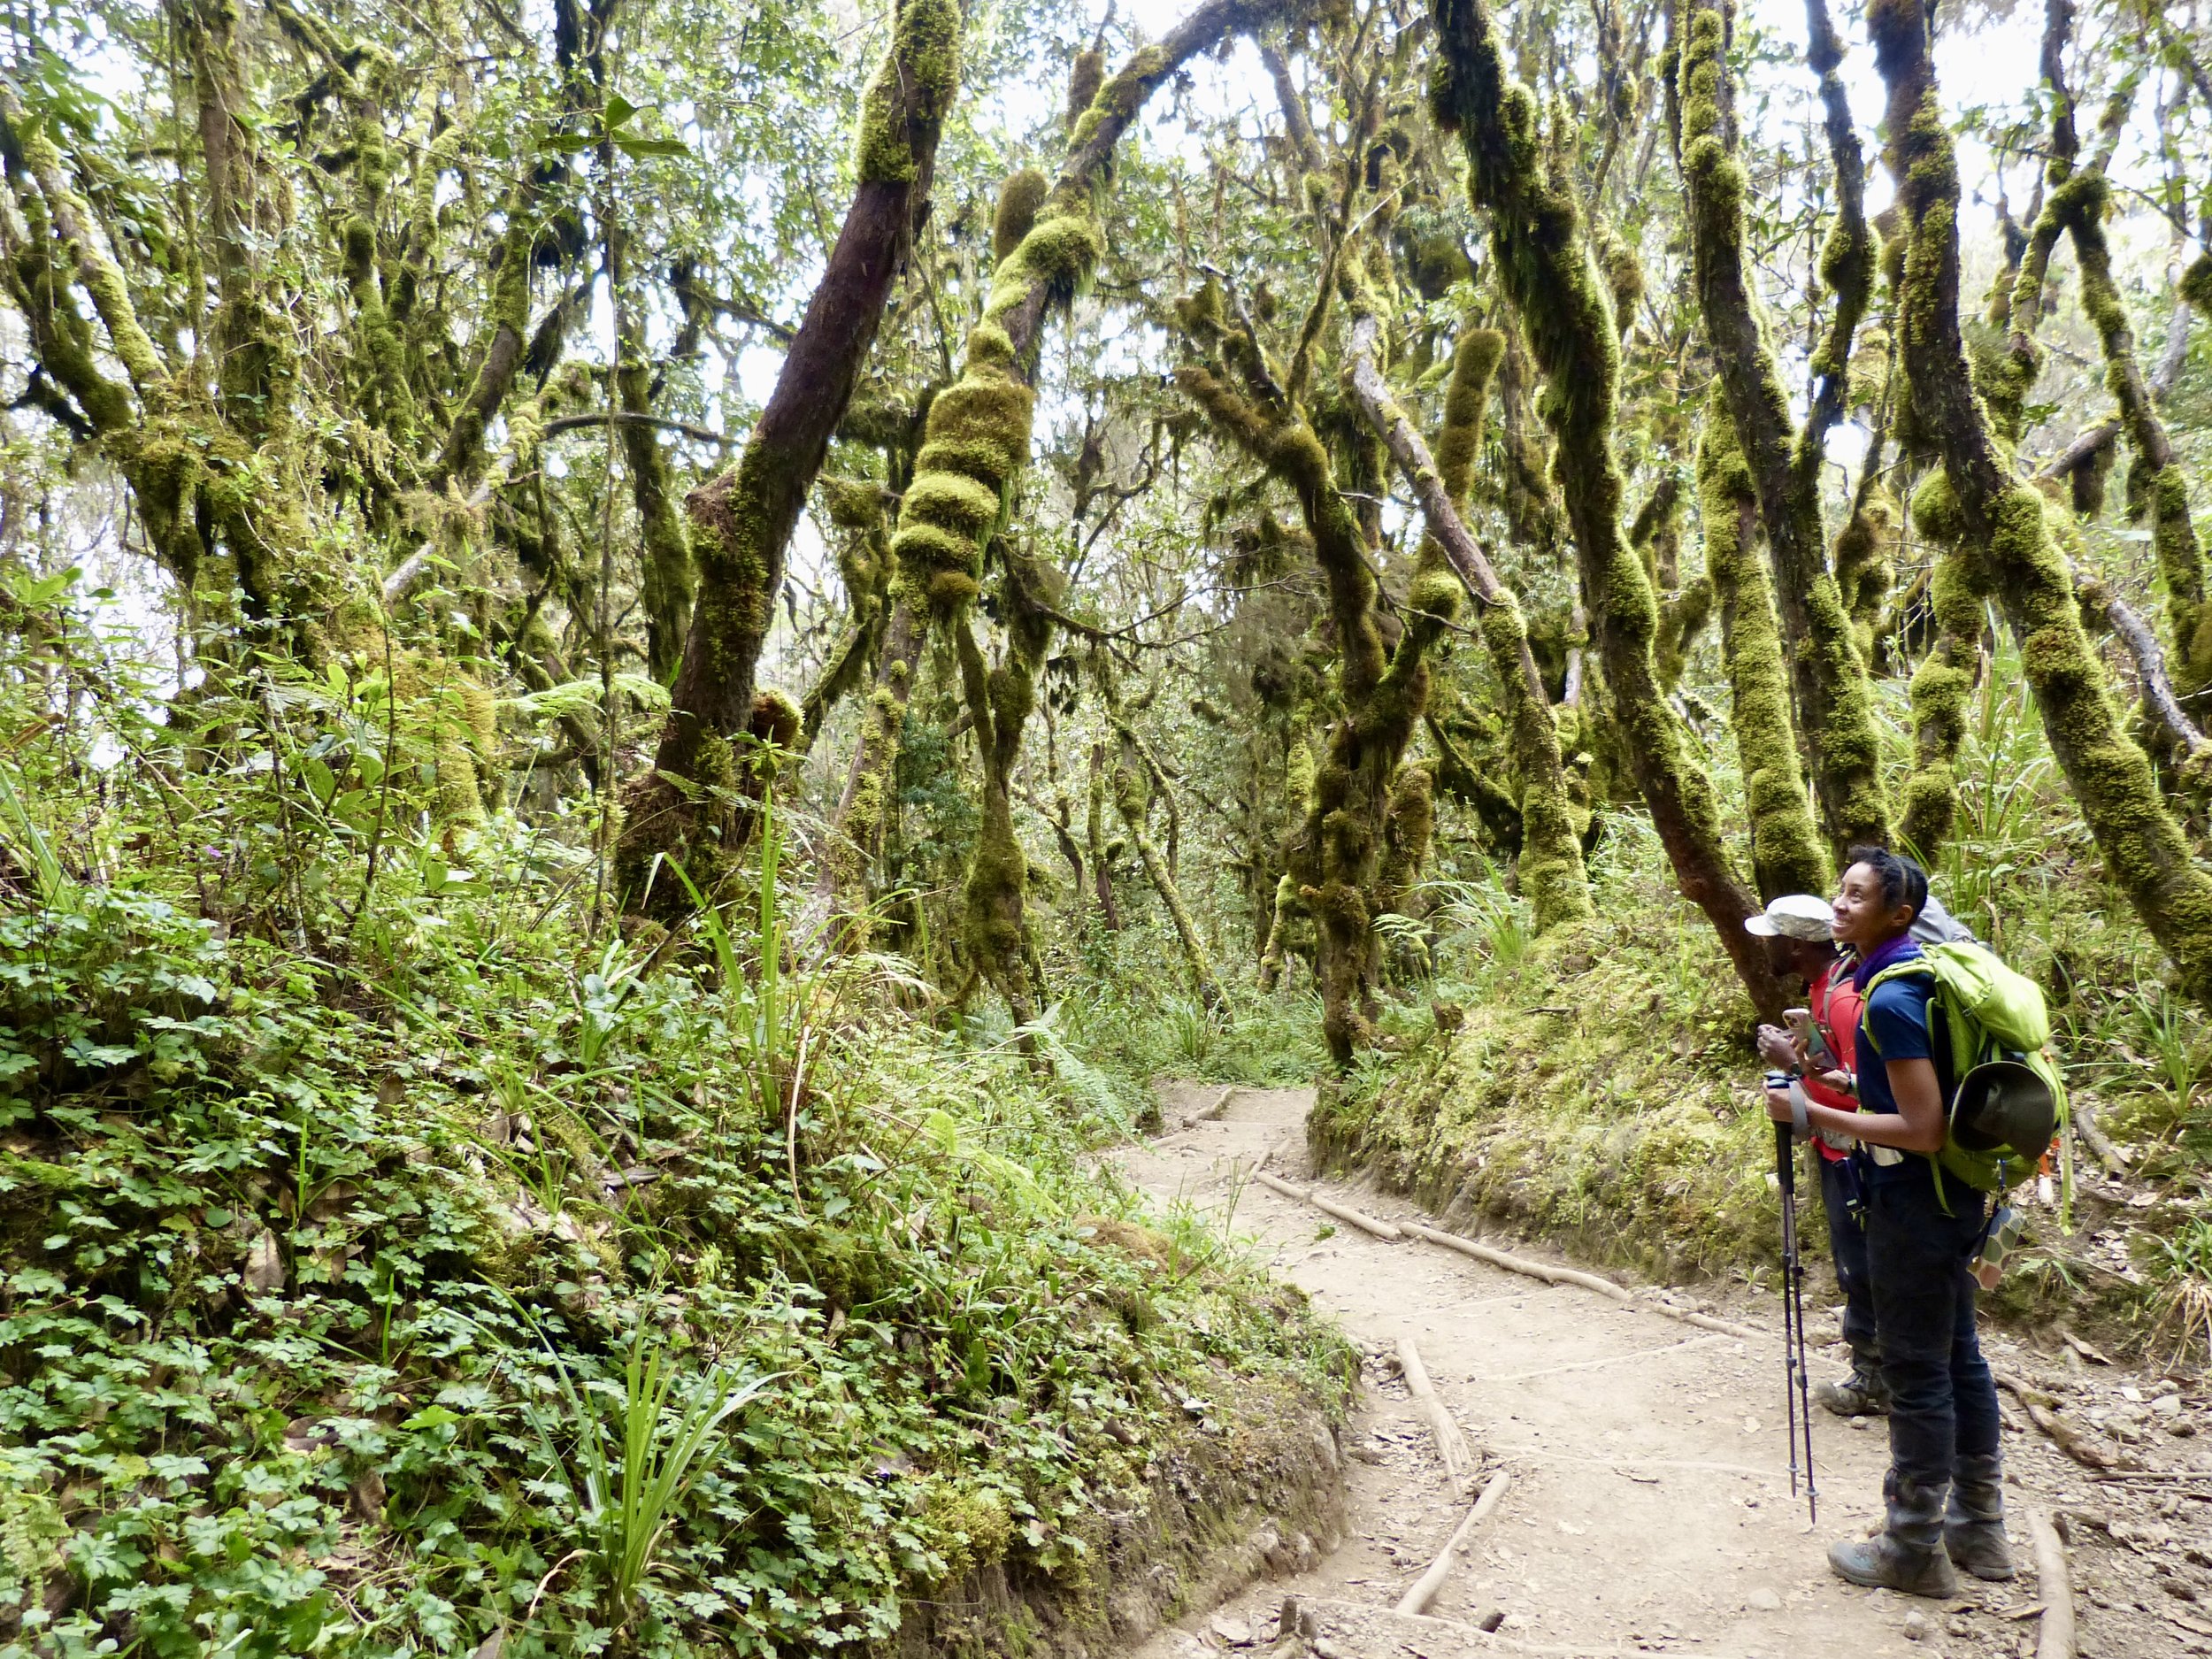
Our last day ranged from down coats to short sleeves. [Visual description: Kassina and Msuri on the path. Kassina looking up at the trees and smiling, wearing blue shirt, black pants, green backpack. Msuri looking down the path wearing a khaki hat and red shirt. Lush green ferns and grasses on either side of the dusty path. Skinny tall trees covered in soft lime green moss climb upwards out of the shot.]
Pick a date! This is tricky. For me, this involved a lot of PTO calculations which guided timing. The season also matters—consider temperature, clouds, crowds, precipitation. And so, considering both Kassina & my life obligations as well as ideal seasonal weather for Kili, we opted for early to mid-October dates.
You are on a mountain & hiking through five different ecological zones—so weather is, of course, unpredictable. That said, most trekking companies do not offer trips during the two rainy seasons during April-May, and November. As far as the actual “snows of Kilimanjaro”, the summit is more likely to be snow-covered from November-March. We had only scree in October. But you’ll still see glaciers year-round, while they exist.
If you go in a month with higher precipitation, that may guide you to a route that is on the dryer, northern slopes of the mountain. But that doesn’t mean you won’t get wet in any season or on any route! Here’s A Nitty-Gritty Packing Guide for Kilimanjaro so you’re well prepared.
6. Route.
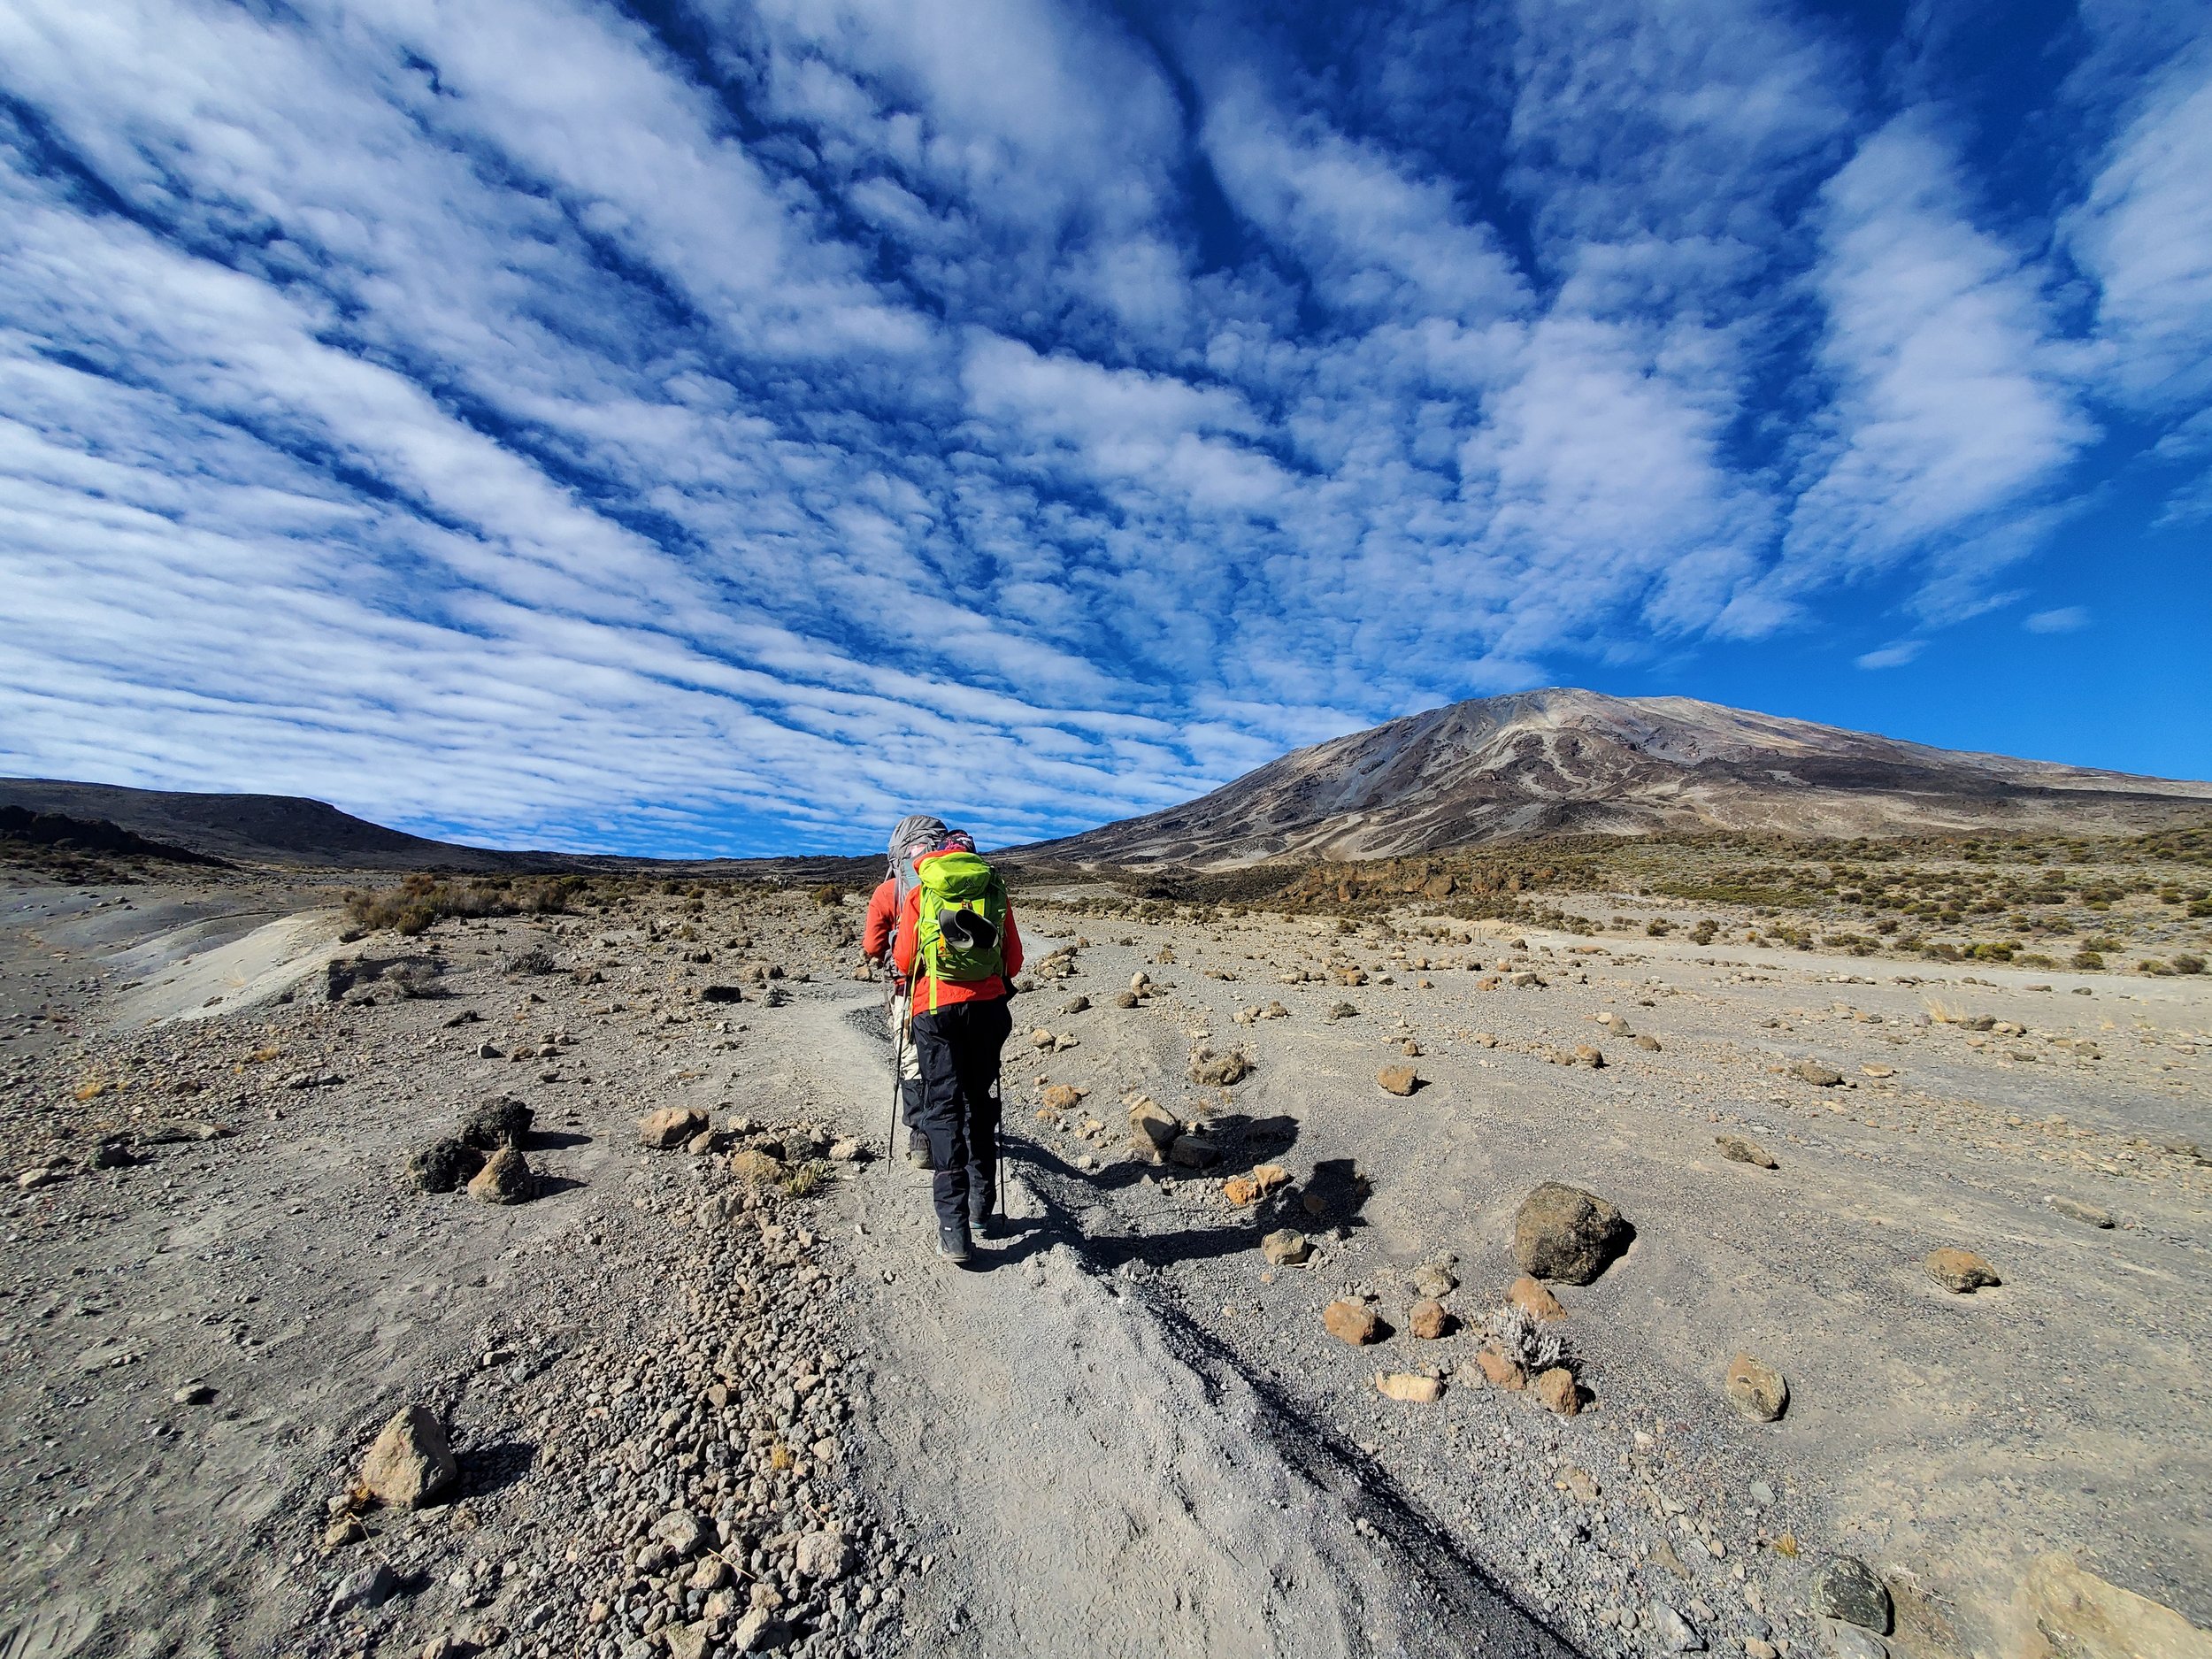
Uhuru Peak looks so tiny from this angle! On the path from Third Cave Camp to Kibo Hut. [Visual description: Landscape shot with two people hiking on a path. Person with orange/red coat and bright green backpack, black pants and trekking poles. Foreground with scree and boulders, some green shrubs in background. Uhuru Peak on the right, but it looks quite small in this photo. Bright blue sky with sweeping white clouds.]
If you have a desired route no matter the length & expense, focus there first. I don’t think there is a “bad” route on Kilimanjaro, at least none that are offered by reputable trekking companies. But consider that some are more crowded, steep, and less scenic than others.
Kassina easily convinced me on The Northern Circuit Route. We knew this route would come with a heftier price as it is longer & therefore most expensive. The Northern Circuit starts on the Lemosho route & ends on the Mweka Route, while criss-crossing several others. The Mweka Route is primarily used for descent & leads to Mweka Gate in Moshi town. The first days on Lemosho & the last on Mweka were crowded in comparison to the actual northern circuit where we had two camps entirely to our group. Whatever route you choose—you will likely ascend one path and descend another, which makes for a more engaging hike!
Most operator’s day-to-day route breakdown lists hiking time in hours & elevation gain/loss. As for the actual mileage, I honestly didn’t pay attention. Obviously the number of daily hiking hours varies greatly depending on you & your group! But for most days, we were starting our day between 7-8am and ending around 1-3pm. If you think you need extra time or rest days, I’m sure operators would work with you to make it happen.
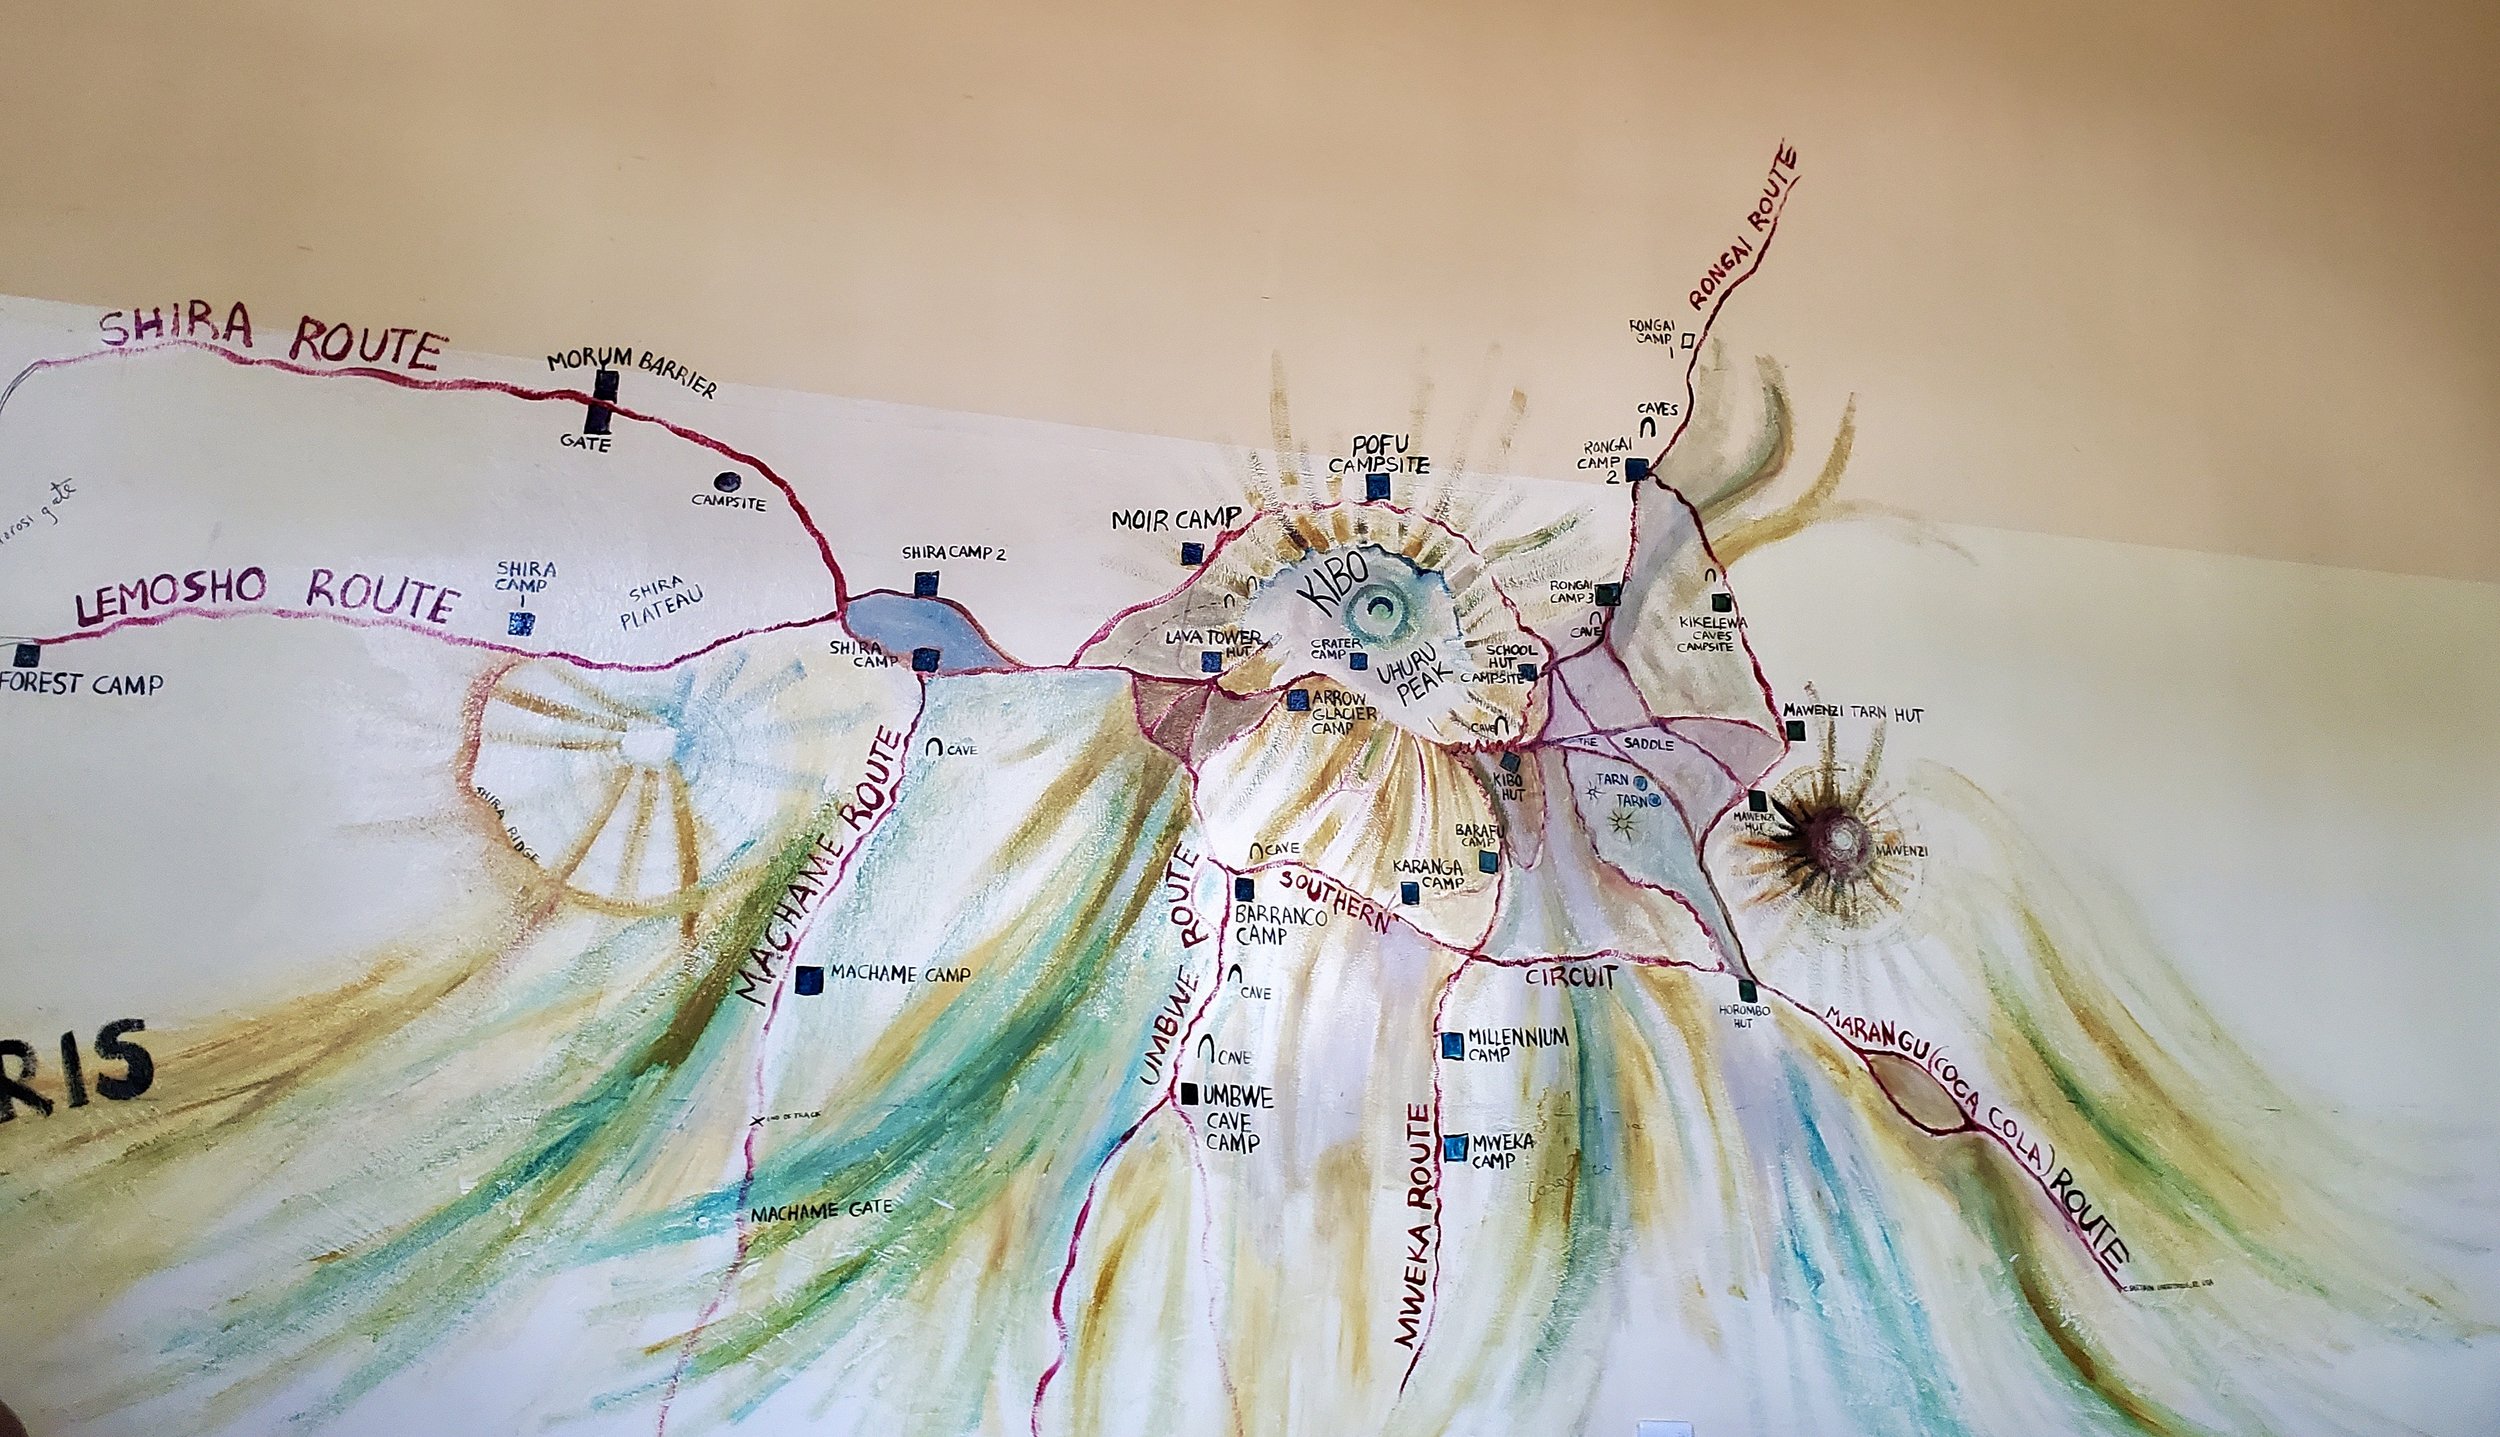
We started on Lemosho Route, with the first camp at Forest Camp, Shira I, Shira II, to Lava Tower for acclimatization, before diverting on the “Northern Circuit” and looping around to Kibo Hut. After the summit, we made the long descent to Millenium Camp on the Mweka Route to the base. [Brief visual description: Wall mural map of the different routes to climb Uhuru Peak on Kilimanjaro. The routes labeled in red, with green/blue/brown/white chalk to draw mountain features].
7. the trek. the summit.
To be Continued…